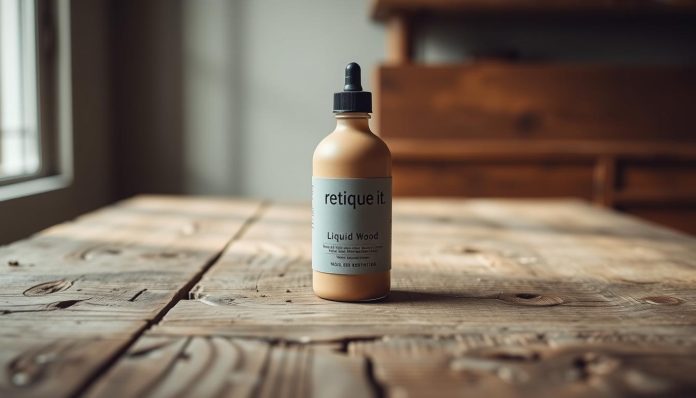
Retique It offers an easy, brush-on solution when you want a fresh look for tired wood. This review shows how the liquid wood product behaves on real surfaces and what you can expect from prep to finish.
One test on a solid ash board with a small can of Light Wood and two stains left the user disappointed. Another user used a kit — liquid wood plus Dark Walnut stain, Java gel, Poly Sealer Satin, brushes, sponge, and a graining tool — and achieved a good, livable color on a budget console table.
The process is clear: lay down a protective sheet, brush on the base, wait about two hours, stain while the coating accepts dye, then seal and cure for several days. Expect some trial and error with drawers, legs, and grain tools. Click expand for deeper tips and tool choices.
Key Takeaways
- Real-world results vary: performance depends on underlying surfaces and stain choice.
- Liquid wood can make many pieces look like wood, but uniformity is not guaranteed.
- Kits include useful extras; better rags and small brushes help control mess.
- Dry and cure times matter — plan for a multi-day finish schedule.
- We’ll show what works, what struggles, and who should try this product.
What Is Retique It Liquid Wood and Who Is It For?
This brush-on, stainable wood layer turns stubborn finishes into a predictable base for color and sheen.
How the product works: It lays down real wood fibers so you can apply a traditional stain over surfaces that usually won’t accept dye. The process feels closer to paint plus stain than pure woodworking. Brush, let dry, stain, then seal.
Best fit
Use this on non-porous or low-porous substrates: thin veneers, MDF, and plastic-laminate tables are great candidates. For renters and busy homeowners, the base coat has low odor and allows indoor work with decent ventilation.
When to skip
If your piece is solid hardwood and you want an heirloom finish, stick to sanding and a traditional refinish. Natural grain and depth on real wood still outperform surface coatings for longevity.
- Try a small test spot first.
- Watch a few videos to set expectations for grain versus smooth looks.
| Best For | Typical Substrates | Why Use |
|---|---|---|
| MDF / Veneer | MDF, thin veneers | Creates a stainable surface where stains fail |
| Plastic-Coated Pieces | Plastic-laminate tops | Gives wood look without stripping |
| Solid Hardwood | Ash, oak, maple | Better to refinish traditionally for depth |
How Retique It Works: From Liquid Wood to Stainable “Grain”
Follow these practical directions to lay a brush-on base that accepts stain and reads like wood.
Prep and application: Start with clean, dry surfaces. Wipe away dust and oils so the coating bonds. Patch divots with a compatible filler and sand smooth before coating.
Basic directions: Brush the liquid wood in long, even strokes and feather edges to avoid lap marks. A user let the first coat dry about two hours before staining. Work in sections when you stain; one test used roughly five minutes before wiping, then a shorter second pass on flat tops for deeper color.
“The sealer dried to the touch in a couple of hours, but the surface needed days to fully cure,” a user reported.
- Pick oil or water-based stains based on odor and open time; water-based cleans with water and smells less.
- Use a quality brush, sponge, and lint-free cloth for wiping.
- The manufacturer suggests curing time; avoid placing items until fully set.
Notes: Results will vary by substrate—tests on solid ash gave weak color, showing the process has limits. For extra grain, a second thin coat or a graining tool can help.
Hands-On Results: Mixed Outcomes from Real-World Tests
Field tests produced mixed color gains—one hardwood barely budged, while a budget table transformed enough to blend with its room.

On real ash board: muted color
One tester coated a solid ash board with the product and tried two approaches. The left end got two coats of Cabot cherry stain, wiped as the brand suggests.
The right end was treated with a TransTint reddish brown dye in denatured alcohol. Both ended up looking muted and unimpressive.
Takeaway: if you want the deep richness of a traditional finish on real wood, this method may not deliver.
On a console/sofa table: a practical makeover
A budget console with unknown veneer or composite responded much better. The piece was cleaned, coated, dried two hours, then stained in sections.
Stains sat about five minutes before wiping, which helped reach a more consistent color across flat surfaces. Drawers and legs needed extra attention.
Finish variables and tools
Uniformity proved the trickiest part. Wiping on vertical pieces left back-and-forth marks that required small brushes and better cloths from a local shop.
Managing minutes between application and wipe-off mattered. Tops did best with a shorter dwell; turned legs needed lighter, faster passes.
- Expect touch-ups: edges and grooves take a bit more work to match the whole piece.
- Odor and cure: base coat smelled mild, but sealing produced stronger fumes—ventilate while curing.
- Small investment: absorbent rags, a detail brush, and a sealer brush made a lot of difference.
“The final sealed surface felt serviceable after a couple of hours, but waiting several days before styling the top helped avoid marks.”
retique it Pros and Cons
Field reports show the product can rescue laminate furniture, while dense wood may resist dramatic color gains.

Pros are clear: the base coat creates a stainable surface on pieces that normally reject dye. Users liked the low odor during application, which makes indoor work more feasible.
Cons matter too. On solid hardwood, the final look can feel flat compared with traditional refinishing. Achieving an even result on drawers, legs, and grooves takes practice and better rags or small brushes.
- Stainable surface: lets you get a wood-forward look on laminate and veneer.
- Low odor: the base product can be applied indoors with ventilation.
- Flexible finish: use a graining tool or keep smooth for different looks.
- Practice required: uniform color on complex shapes can be tricky.
- Sealer smells: staining and sealing have normal fumes; allow days to cure before use.
- Surface repairs: minor filler work improves results but adds a step.
“The console table came together nicely after extra rags and a detail brush—drawers needed touch-ups.”
Bottom line: This is a budget-friendly way to refresh a table or other problem surfaces. For fine wood where grain and depth matter most, traditional refinishing still wins.
Best Use Cases and Compatible Surfaces
Small projects with broad, flat faces show the biggest payoff.
Many users find a console or end table responds well when you apply a stainable layer and follow the directions. A successful indoor test used minimal base-coat odor, dried two hours, then stained and sealed. The top looked like wood from normal viewing distance.

MDF, veneers, and plastic-laminate candidates
Ideal for: MDF cabinets, thin veneers, and plastic surfaces where a normal stain won’t bite. The coating builds a surface that will accept dye and can be finished to a wood paint look.
Whole-piece projects vs flat tops only
Work across a whole piece—tables, dressers, and consoles—so color matches faces and edges. Refreshing only a flat top can leave a mismatch with old sides.
Color goals and grain options
If you want to shift a cherry-looking finish toward walnut or Java without heavy sanding, this method would work. A single coat often covers, but a second thin coat smooths glossy spots. For more visible grain, try light graining between coats with a graining tool. Many prefer a smooth wood paint finish for a natural look from a distance.
- Protect floors with a sheet or plastic drop cloth and keep water or solvent per directions handy.
- Test stain on a hidden area; adjust dwell time if a result reads too much like cherry or needs cooler tones.
- Extra rags and a quality brush from the shop reduce streaks around drawers and legs.
| Surface | Project Type | Why Use |
|---|---|---|
| MDF / Thin Veneer | Cabinets, end tables | Creates a stainable surface where stain usually fails |
| Plastic-laminate | Desks, console tops | Makes laminate read like wood without stripping |
| Complex Shapes | Drawers, turned legs | Requires more time, extra cloths, and detail brush work |
“The console table came together nicely after extra rags and a detail brush—drawers needed touch-ups.”
Tools, Kits, and Graining Options
Kits turn a multi-step refinish into a focused, weekend project by packaging the base, stain, and applicators you need.
What’s usually in a kit: many bundles include liquid wood, a classic Dark Walnut stain, a satin Poly sealer, and 2″ and 3″ wonder brushes for flats and edges. One buyer’s kit added a Java water-based gel stain, extra sponges, and a graining tool so they could try both smooth and textured looks indoors with low odor from the base coat.
Graining choices: the graining tool is optional. Use one when you want a visible grain across broad surfaces. Skip it when a smooth, wood paint finish fits your room better. Keep a small detail brush for corners and a larger brush or pad for a level sealer coat on a table top.
- Typical kits bundle stainable base, stain, sealer, and basic brushes.
- Add a water-based gel stain for lower odor and easier cleanup, or an oil stain for longer open time.
- Test a light pass with a graining tool versus a smooth finish on a hidden area to see what would work on your piece.
- Short videos can show brush vs sponge technique and graining timing.
| Item | Use | Why it helps |
|---|---|---|
| Liquid wood | Base coat | Makes non-porous surfaces accept stain |
| Graining tool | Texture pass | Creates faux grain on flat wood-like surfaces |
| Wonder brushes | Apply sealer/stain | Covers flats and edges cleanly |
| Detail brush & rags | Trim and wipe | Prevents pooling and evens color |
Alternatives and the Faux vs Natural Wood Debate
Choosing between traditional refinishing and a faux surface system depends on the piece, budget, and long-term goals.
Refinishing real wood: why purists still choose stain and true grain
Solid hardwood responds to sanding, conditioning, and stain in a way faux layers cannot fully match. The natural grain gives depth, clarity, and character that endure over decades.
A craftsman noted that quality mid-century pieces regain value with a classic finish. For an heirloom table, a traditional approach is the lasting option.
When faux finishes make practical sense
Faux systems shine on MDF, plastic-laminate, and mass-market furniture where traditional stripping isn’t feasible. These products let a surface look like wood at normal viewing distance with far less labor.
Use a compatible filler for dents and seams before coating. A graining tool or smooth wood paint finish is optional, depending on whether you want texture or a contemporary flat look.
“If the piece is more about budget than legacy, a layered surface can bridge the gap until you invest in real hardwood.”
- Purists: sand, condition, and stain solid wood for true grain depth.
- Practical: choose faux systems for MDF, veneer, or plastic surfaces.
- Prep: fill dents with the right filler to keep the finished surface even.
- Test: follow a manufacturer’s system and try a small post before full application.
| Scenario | Best Approach | Why |
|---|---|---|
| Solid hardwood table | Traditional sanding & stain | Preserves true grain and long-term value |
| MDF or veneer furniture | Faux surface system | Creates a stainable surface without stripping |
| Mass-market table with dents | Filler + layered finish | Quick refresh that evens surface and saves cost |
| Mid-century or Danish look | Natural finish on real wood | Authentic grain and restrained sheen fit the aesthetic |
Pro Tips, Common Mistakes, and Process Tweaks
A steady rhythm and small changes during application are the fastest route to a cleaner finish.
Achieving even color: timing, sections, and better cloths
Work in small sections and watch the minutes carefully. Many users report a shorter second pass gives a cleaner color on tops, while vertical faces respond to lighter applications and quicker wipe-offs.
Upgrade your cloths: thick, lint-free rags or shop towels absorb stain more evenly and reduce streaks around edges and drawer fronts. Keep a clean brush from the shop to feather pooling in creases and avoid overworking areas that start to set.
Protecting your space: drop cloths, ventilation, and cure time
Use a plastic tarp instead of a thin sheet; thin sheets can allow stain to bleed through. Tape corners and high-drip spots so floors stay clean.
Ventilate during staining and sealing. Open windows, run fans, and expect stronger smells from sealer than from the base coat. Let the piece sit undisturbed for several days so the sealer can cure before styling.
“A shorter second dwell improved the top’s color and made touch-ups far easier.”
- If color skews warm, shorten dwell time or layer a cooler stain on a test spot first.
- Keep water or the right cleaner handy per directions to clean tools and hands quickly.
- For complex profiles, use a small detail tool and a light touch to avoid dark bands.
- Thanks to good prep, consistent timing, and better materials, a lot of the result comes down to patience and steady process control at home.
| Tip | Why | Quick Action |
|---|---|---|
| Work in sections | Prevents lap marks and uneven color | Time each pass in minutes |
| Use plastic sheet | Stops bleed-through to floors | Tape edges and corners |
| Better cloths & brushes | Reduce streaks and fix grooves | Buy lint-free rags and small detail brushes from the shop |
Conclusion
When a practical update is the goal, this method can be a smart choice for tricky surfaces.
, Retique It and its liquid wood layer work best on veneers, MDF, and plastic-laminate where sanding to bare wood isn’t possible. One ash board test with a Cabot cherry stain and a TransTint dye underperformed, while a console table refresh succeeded with careful timing and extra cloths.
Follow the manufacturer notes for stains and sealer, allow days for the finish to cure, and keep good brushes and lint-free rags on hand. For quick troubleshooting or step reminders, click expand in the post above.
Used on the right project, this product can make a piece look refreshed at home and stand up to daily things with reasonable wear.


